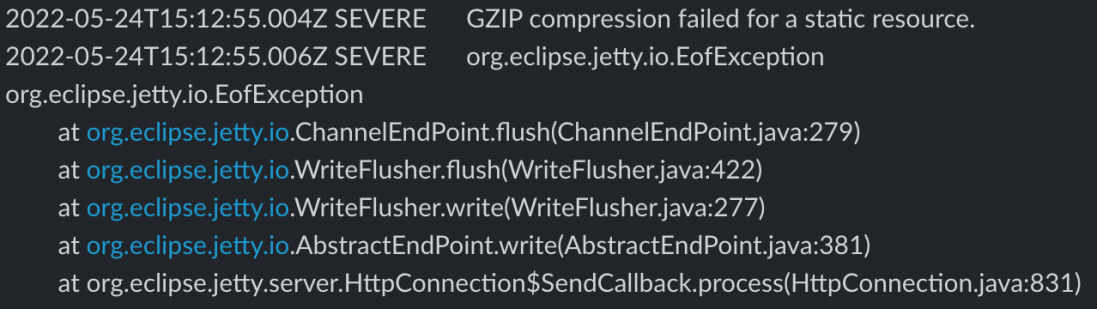
Sometimes it can be hard to get to the root cause of an error reported by software which makes it even more difficult solve it. This org.eclipse.jetty.io.EofException with message GZIP compression failed for a static resource is one of those. There can be any number of root causes with this exception. One of them is memory. Or rather the lack of it.
With ORDS 22.1.0, and later, the default memory Java heap size may not be ideal for your specific work load. Static documents, or even the size of large result sets, read into memory might cause your request processing to hit a limit.
Memory options for Java applications can be set at runtime. To achieve this with ORDS set the JDK_JAVA_OPTIONS environment variable before starting ORDS. For example
You should see output from the Java runtime environment stating that it has applied the options at startup..
NOTE: Picked up JDK_JAVA_OPTIONS: -Xmx512m

ORDS: Release 22.1 Production on Tue May 03 15:00:27 2022
Identifying the values that are applicable to your environment does require some investigation and perhaps some trial and error in some cases. Now you know though, a GZIP compression error can have memory issues as the root cause and you also know how to fix it.
UPDATE! As of ORDS 22.2.0 there is a command to generate web application for deployment to Apache Tomcat or Oracle WebLogic Server. See Deploying Oracle REST Data Services. The below article is informative and perhaps worth your time to get an understanding of web application deployment but there are supported, documented steps for achieving the same thing with the ORDS product. In fact, what is in the ORDS product is better because it also caters for jar content in the /lib/ext/ folder which this article does not cover.
ORDS 22.1.0 introduced a substantial set of changes: Java 11 as minimum, new command line interface and a new configuration directory structure. In fact it is a release that introduces a whole new deployment paradigm.
Deployment Options
What we knew as Standalone Mode in previous ORDS releases still exists and is now initiated through a serve command. The embedded Eclipse Jetty web server and servlet container engine is still at the heart of this convenient way to have ORDS listen HTTP/HTTPS traffic. The significant change is how the configuration directory is determined at startup. There is no longer a requirement to modify the distributed ords.war to set the configuration directory location.
Deployment on a supported servlet container, such as Oracle WebLogic Server or Apache Tomcat, is similarly impacted by this principle that the distributed ords.war should not be modified. A new mechanism for specifying the configuration directory when the application is deployed is required. The ORDS documentation covers the standard approach for a typical setup, use a Java System Property ( -Dconfig.url=/ords_config/ ), startup your server(s) and deploy the web application.
Single Server
For some developers that may not have a full production environment scaled out for high availability, or may be restricted in the Apache Tomcat or WebLogic Server deployment options, the approach to set different servers with their own ords.war and configuration is not always feasible. With previous ORDS releases they may have had the practice of deploying multiple ORDS web applications with different contexts and configurations. At first it would appear that the new direction in ORDS 22.1.0 makes that impossible but it is not. All that is required are a few extra steps.
Bake your own
For deploying to Apache Tomcat or WebLogic Server you can make your own, separate web application with the config.url baked in. Moreover, you can call it whatever makes sense in your context.
This script produces a new web application archive file with the jars from the distributed ords.war and web.xml deployment descriptor has the configuration directory path set. That way, wherever it is deployed, it will refer to the specified configuration directory.
Usage: create_deploy_war <source ords.war> <destination war filename> <configuration directory>
For example, if I want to have two ORDS instances deployed called tom and jerry with two separate configuration directories and I have extracted the ORDS 22.1.0 to /opt/oracle/ords-22.1.0.105.1723/. The jerry web application will be configured with a default pool pointing to an Oracle 19c database. The tom web application will be configured with a default pool pointing to an Oracle 21c database. We will show both web applications have these configurations by using the REST Enabled SQL service in ORDS to return database version information. Before that, the web application files must first be created…
Similar behaviour with Apache Tomcat with two different web applications with their own, separate, configuration.
Summary
What I have demonstrated is a script which produces a new web application for deployment in Apache Tomcat or WebLogic Server. The script is written for Python 2 because that’s the version distributed with Oracle WebLogic Server. It creates a new web application based on the distributed ords.war but without the META-INF content. That content includes a signature digest of the web.xml which will be invalid when the new deployment descriptor is written to the new WAR file.
This is what makes it possible to have multiple ORDS instances deployed to the same server all with different configuration directories.
RESTful services often involve JSON structures for request and response payloads. On occasion there is a requirement to integrate with another service or system that does not use JSON or expects a particular JSON structure. This can be catered for in an ORDS plsql/block based service and in practice may be the most performant approach to take for individual services. Imagine a scenario where existing services, perhaps from AutoREST enabling tables and views, you want a YAML representation option as well. ORDS provides a plugin framework which makes it possible to extend the functionality and introduce custom behaviour such as this.
JSON and YAML
Default content type: application/json
When an ORDS service is created, by rest enabling a table for example, the default content type for requests and response payloads is application/json. The following request to get data from the EMPLOYEES table in the HR schema…
The end goal for this exercise is to convert any application/json response to a text/yaml response without having to modify the service implementation. The client specifies that YAML should be returned by stating that text/yaml is acceptable…
To achieve this we will code our own custom plugin to ORDS. The ORDS distribution from oracle.com/rest contains example plugins and for simplicity one of these examples will be copied as the basis of our new custom plugin. First I’ll provide the code and steps to build the plugin. Then I will go through the plugin code to explain key parts.
Assumptions and prerequisites
This example is based on the plugin examples in the ORDS Getting Started tutorial. It is assumed that you are already familiar with that plugin-demo Servlet example.
We’re using ORDS 21.4.0 with Oracle Java 1.8 in standalone mode. It has already been setup with a configdir containing valid connection details to a database that has ORDS installed. There is a REST Enabled schema in the database with a REST Enabled table that does not require authentication to access. In my example the schema is HR, the table is EMPLOYEES and the RESTful endpoint is http://localhost:8080/ords/hr/employees.
ORDS 21.4.0 ships with Jackson 2.13.0 so any other jars that are required at compile or runtime will be related to that particular release. If you are using a later version of ORDS you should use the Jackson release that is applicable.
In this article I will refer to the new plugin as plugin-yaml but you can use any name that suits.
Copy the examples/plugins/plugins-demo directory to examples/plugins/plugin-yaml
Change the project name in the build.xml to plugin-yaml
<project default=”dist” name=”plugin-yaml”>
Remove the examples/plugins/plugin-yaml/src/example/PluginDemo.java
Download PluginYaml.java to examples/plugins/plugin-yaml/src/example/
There are 3 jars to add to the ords.war as plugins. The plugin-yaml.jar which we have built from source and the 2 runtime dependencies jackson-dataform-yaml and snakeyaml. Any subsequent code changes in examples/plugins/plugin-yaml/src/ will require the ant project to be built again but only the produced plugin-yaml.jar must be added to the ords.war again.
Example output from running ant command:
Buildfile: /scratch/ords-21.4.0.348.1956/examples/plugins/plugin-yaml/build.xml

clean:
   [delete] Deleting directory /scratch/ords-21.4.0.348.1956/examples/plugins/plugin-yaml/built

compile:
    [mkdir] Created dir: /scratch/ords-21.4.0.348.1956/examples/plugins/plugin-yaml/built/classes
    [javac] Compiling 1 source file to /scratch/ords-21.4.0.348.1956/examples/plugins/plugin-yaml/built/classes
    [javac] Note: Discovered type annotated with @Provides: example.PluginYaml

dist:
      [jar] Building jar: /scratch/ords-21.4.0.348.1956/examples/plugins/plugin-yaml/built/plugin-yaml.jar

BUILD SUCCESSFUL
Total time: 0 seconds
Code Overview
The PluginYaml.java is a basic javax.servlet.Filter implementation that replaces the response output stream when the servlet container is about to return that response to the calling client. To achieve this, when it is determined that the client provides Accepts: text/yaml in the request, the filter supplies a HttpServletResponseWrapper which captures the original response. That wrapper, in this case called ServletResponseWrapperCopier, uses Jackson mappers to produce a YAML representation of the JSON response content and return that instead.
The performance overhead of producing a response in one structure and creating a copy of it in a different structure may be quite significant for large payloads. Although ORDS provides a plugin framework for you to add functionality, your custom plugin, or any third party jars that you add to the ords.war are not supported by Oracle. The upshot is obvious. When it comes to plugins: test , test , test.
Now that ORDS 21.3.0 is available in all Oracle Autonomous Database regions there are even more options for copying data to, from and within Oracle Cloud. This release contains two important enhancements to the RESTful Data Pump services provided by the ORDS Database API
Any REST Enabled database account can access the Data Pump services. Of course, the database account in question still needs to have the necessary permissions in the database to perform the actions but before this release, only administrators could access the Database API Data Pump services.
Use Oracle Cloud Object Storage for export / import file destination / source. The databases must support the interaction with Object Storage though DBMS_CLOUD package. This is available out of the box with Oracle Autonomous Database.
Options? I got plenty
With these new capabilities, particularly with the Object Storage integration, moving to a hosted Oracle Autonomous Database is even easier. Not only that, moving data between existing Autonomous Databases is now easier too. To demonstrate, this article provides a step by step walk through of copying tables from a 19c Autonomous Database to a 21c Autonomous Database.
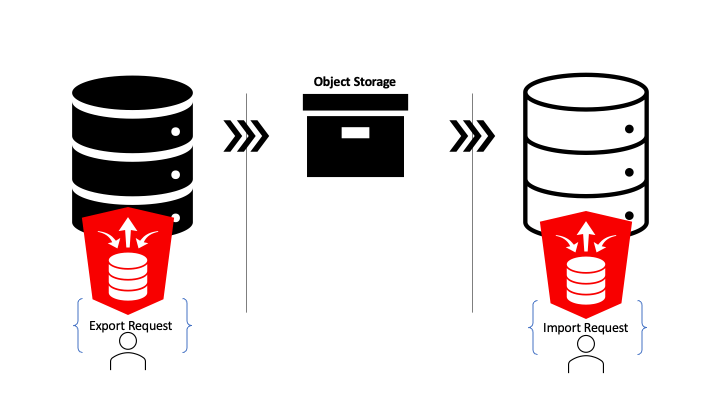
One request to export and one request to import!
Copying data between Autonomous Databases made easy
Just to reiterate the demonstration scenario: non-administrator database users will copy tables and data from hosted 19c database to a hosted 21c database with hosted object storage as the intermediary. That’s achieved through one ORDS Database API Data Pump request to export and one ORDS Database API Data Pump request to import.
To make this all happen so easily does require a little preparation of key components. Here’s what is required…
Two Autonomous databases. For this demonstration they are in the same region, but the Object Storage bucket could be configured to replicate to another region.
Object Storage bucket. A private bucket for file storage in your Oracle Cloud tenancy. The databases will have access to the bucket but will require credentials to do so.
Authorisation Token. These are revokable credentials that will be used by both the source and target databases to connect to the Object Storage bucket.
Database Account. In both databases a REST Enabled database user is required. It is these user credentials that will be used to make the REST request to ORDS. Also, it is these database users that will be performing the DBMS_DATAPUMP procedure calls. Therefore they will require certain privileges in the database. If they are not Administrator users they must have these privileges granted to them. More on that later.
Note that all of the above: Database, Object Storage and ORDS, are available with the Free Tier account on Oracle Cloud Infrastructure.
Autonomous Databases
For this demonstration there are two Always Free databases in the Frankfurt region. The one named DB 201912101106 database is an Oracle 19c Enterprise Edition database. The one named DB 202109201918 is a the 21c database.
Two Always Free Autonomous Databases
Object Storage Bucket
To keep files for this demonstration separate there is a dedicated Object Storage bucket which can be deleted afterwards. There’s plenty of space available in the Free Tier and the bucket is private but it is a good practice not leave exported data files around long.
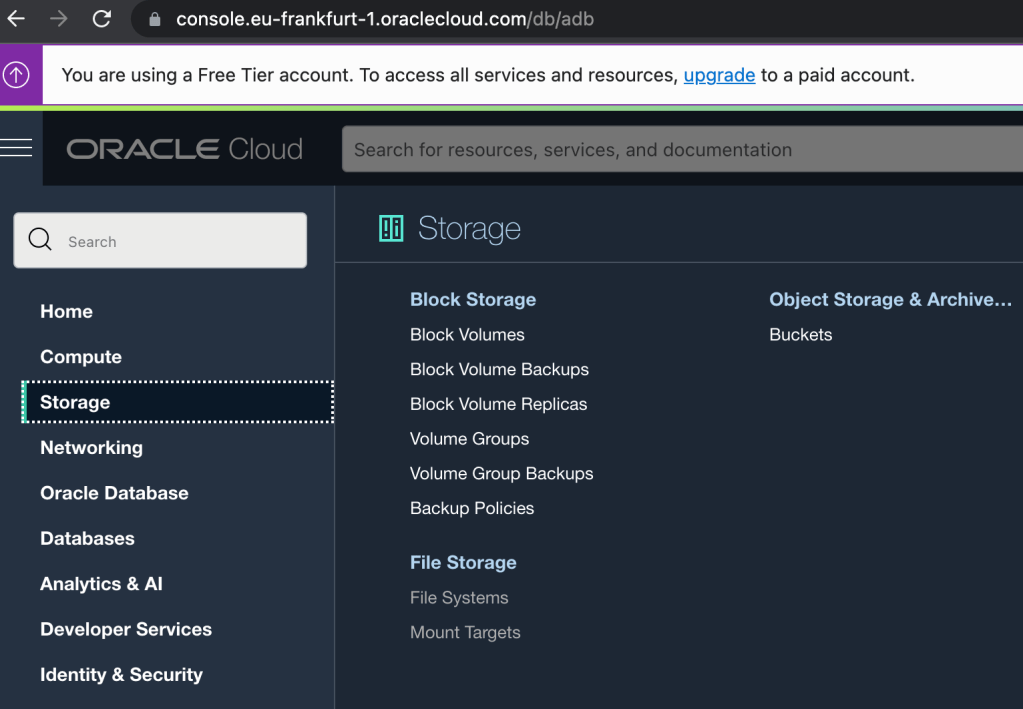
Select ‘Buckets’ in the ‘Storage’ section.
The bucket could be called anything but for simplicity in this demonstration it is named: DataPumpBucket
Create an Object Storage Bucket called DataPumpBucket with a few clicks
Auth Token
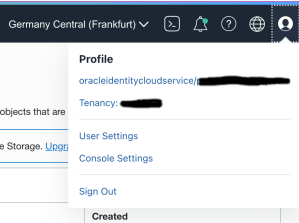
So that the databases can interact with the private Object Storage bucket they need authentication credentials. This is achieved through creating an Auth Token and storing it as a credential in the databases. Tokens are created for a specific Oracle Cloud user and are managed in the User Settings section for the user. The quickest way there is to select User Settings from the profile menu option in the top right corner.
Once in the User Settings section select the Auth Tokens resources tab and click on the Generate Token button. In the popup dialog enter a name for the token. This name can be anything that helps describe the purpose of the token and makes it easier to identify the token later for deleting it if necessary. What really matters is the generated token value because that is effectively the secret password that will be stored in both the source and target databases. After entering a name, in this case it was DataPumpToken, press the Generate Token button to produce a token value. The value is hidden by default. Copy that value as it will not be retrievable once the dialog box is closed. That token value will be used latter when creating Database Credentials in both databases.
Create an Auth Token and copy the value
Database Account – Source and Target Schemas
The source schema will have tables with data that will be exported to the Object Storage bucket. That user must be created, granted the necessary privileges, REST Enabled, and have the tables created too. With the exception of creating tables, the same actions will be taken for the database account in the target database. In both cases the schema/user will be called DBTST. In the source database, the 19c one, the ADMIN user can create a REST Enabled user through Database Actions.
Creating a standard REST Enabled database user
The same can be done by the ADMIN user in the 21c target database. Once created these users can invoke the Data Pump services in ORDS Database API but won’t achieve much as they do not have the necessary privileges. In both databases the ADMIN user must run the following to grant these privileges.
-- REQUIRED FOR DATA PUMP TO OBJECT STORAGE
GRANT EXECUTE ON DBMS_CLOUD TO DBTST;

-- REQUIRED FOR DATA PUMP LOGS
GRANT READ, WRITE on DIRECTORY DATA_PUMP_DIR to DBTST;

-- THESE EXPLICIT GRANTS ARE REQUIRED FOR DATA PUMP
GRANT CREATE ROLE TO DBTST ;
GRANT CREATE VIEW TO DBTST ;
GRANT CREATE SESSION TO DBTST ;
GRANT CREATE TABLE TO DBTST ;
GRANT CREATE SEQUENCE TO DBTST ;
GRANT UNLIMITED TABLESPACE TO DBTST ;
GRANT CREATE PROCEDURE TO DBTST ;
Note that the above is not necessary for users with the DBA role as those users will have these privileges already.
Database Credentials
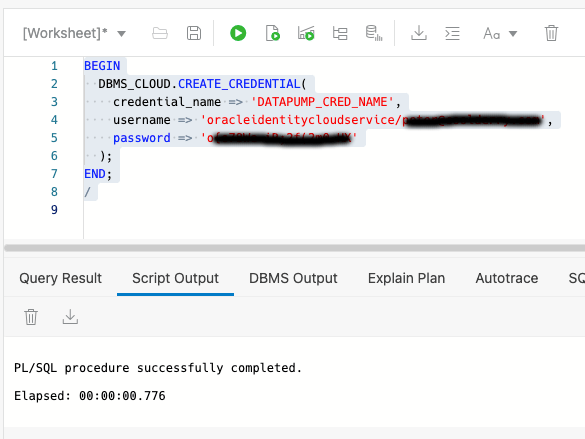
Now we get into defining the credentials that both source and target database accounts will use. Although Data Pump can work with global credentials the ORDS Database API currently restricts the use of credentials to just those that the user has defined themselves. In other words, the credential must found by name in USER_CREDENTIALS view and ENABLED. Login to both the source and target database accounts and run this command, using the token value copied from the Auth Token step and the corresponding username…
Defining a credential in the database with OCI username and Auth Token as password
In the above example the credential name given is DATAPUMP_CRED_NAME. It could be called anything. Whatever name is given, this is the name that is used in the request payload to initiate an export or import job later.
Source Tables
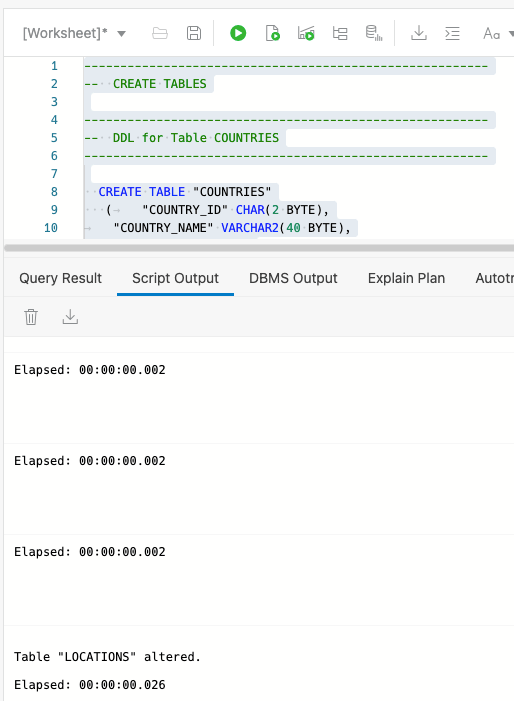
The purpose of this exercise is to show data being copied from one source ( 19c Autonomous Database ) to another ( 21c Autonomous Database ) so let’s create some tables and put some data in them. For the source database account run this dpexp_setup.sql script.
Create tables and populate them with data.
Setup a REST client
Any client for sending HTTP requests will do and curl is a common command line utility that is used in many examples. Although ubiquitous curl does have a few drawbacks for REST calls. In particular that it does not format the response structure well. In this demonstration we’ll use the Postman app to make the requests. For convenience we will import the OpenAPI document that is generated by ORDS. The URL for the openapi.json document will be different for both the source and target REST Enabled schemas and we can take advantage of that to have separate API collections.
To get started, import the API document for the source schema and set the Basic Authentication credentials that will be inherited by all the requests in the collection. Rename the collection to make it clearer what it is for.
Import OpenAPI document to Postman
Make your move
Now it’s time to do what we came here for…
Export from the source Autonomous Database
See the files in Object Storage
Import to the target Autonomous Database
See the data in the new tables
Export
For this demonstration we’ll export all tables, except for JOB_HISTORY, in the DBTST schema to the bucket called DataPumpBucket. The URL for bucket and the Data Pump filename pattern will be used. You can derive the URL from the OCI console Bucket details page which ends with /DataPumpBucket/objects. Replace the https://console. prefix with https://objectstorage. Then replace the DataPumpBucket/objects suffix with DataPumpBucket/o/ and then add the filename pattern. In this case we’ll go with EXPDAT%U-DBTST.DMP. Oracle Data Pump will create numbered files with that pattern in the bucket.
Initiate a Data Pump Import Job
Now that the Data Pump Job is created its status and log can be retrieved. It’s easy to create a new REST request in Postman just by clicking on the link in the response body. Save the request definition so that the previously defined Basic Authentication can be inherited.
Review the job status and log file
Review Object Storage
Refresh the bucket details page to see that Oracle Data Pump has created files there.
Oracle Data Pump created export files based on the requested filename pattern
Import
Now for getting the data imported to the target database. As before, the Postman app has the Database API document imported as a collection so that the URL and basic authorisation details are defined in one place. Using the Database API we can confirm that this DBTST schema does not have any tables.
Database API – Get all tables with Filter Object query
Next, submit the import request. The credential_name and file_name parameters are the same as the export but operation parameter value should now be IMPORT.
Initiate the Data Pump import job
Now review the Data Pump import job status and confirm that the tables have been created.
Check the job status and see that the tables are created
Now that the tables are there, Database Actions can be used to confirm they have data too.
See the imported data
While in Database Actions you can review Data Pump jobs too!
Conclusion
What has been demonstrated here is just one of the many options now available getting data to, from or between Autonomous Databases. There were a few perquisite steps but once they are in place, exporting and importing can be repeated with just one request each.
Although an on-premise database may not have the DBMS_CLOUD integration for accessing Oracle Cloud Object Storage, the ability for non-administrator users to import and export to their database directory is now available through ORDS Database API.
The demonstration showed exporting and importing tables but don’t forget that through the ORDS Database API Data Pump services you can do much more. Export the full databases, remap a schema on import, and much more. Over to you to take this further in your environment.
ORDS provides insight to its database pool cache through the ORDS Instance API. This is extremely useful for monitoring the database connection usage on a particular ORDS instance. Such information could reveal how close ORDS gets to using up its available connections as a result of the requests coming in and their correspond SQL statements. That would indicate if more resources or optimisations are required.
The ORDS Instance API is intended for System Administrator use in the deployed infrastructure. Users with this role are extremely powerful. Therefore the credentials for such users are extremely sensitive and how they are used should be carefully considered.
This article introduces an example application which shows how APEX could be used to retrieve the Database Pool Cache information with ORDS System Administrator credentials secured. The number of available and borrowed connections for both the APEX_PUBLIC_USER and ORDS_PUBLIC_USER database accounts are retrieved every 10 minutes and a chart of the data displayed.
Showing a snapshot of pool usage every 10 minutes
Configure ORDS Instance API
Stating the obvious here, but to get the database pool cache information from ORDS, the Instance API has to be enabled first. The steps for doing so are already covered in the product documentation but I’m going to call it out as prerequisite for this exercise. Also, just to repeat the product documentation, using the credentials file ( also known as: File Based User Repository ) is not intended for production use.
Keep secrets secret
In my case I defined a user called sysadmin with the System Administrator role and whose credentials will be provided on every request. To keep the credentials separate from the APEX application I’ll define them in the workspace and state that these credentials can only be used for Instance API requests. That means the same credentials could not be used for other ORDS services such as the Oracle Home information and DBCA operations available through the Database API environment category of services.
Specify Web Credentials for sysadmin in Workspace Utilities
About that URL
At this point you’ve probably noticed the host.docker.internal portion of the URL. I’m using that because I’m running the database in a docker container hosted on the same machine that ORDS is running on. If I was to refer to localhost, that would be the docker container. The host.docker.internal identifies the machine hosting the container. Docker provides a number of other networking options here but this is the simplest for my setup.
In this case, ORDS standalone is running on port 8080 on that machine. We’ll use this URL again when defining a REST Data Source in our APEX application.
>java -jar ords.war standalone

2021-10-11T09:23:33.448Z INFO        HTTP and HTTP/2 cleartext listening on host: localhost port: 8080
2021-10-11T09:23:33.466Z INFO        Disabling document root because the specified folder does not exist: /scratch/ords-21.3.0.266.1100/config/ords/standalone/doc_root
2021-10-11T09:23:35.052Z INFO        Configuration properties for: |apex|pu|
database.api.enabled=true
db.connectionType=basic
db.hostname=localhost
db.port=1521
db.servicename=orclpdb1
feature.sdw=true
instance.api.enabled=true
restEnabledSql.active=true
db.password=******
db.username=ORDS_PUBLIC_USER

2021-10-11T09:23:35.053Z WARNING     *** jdbc.MaxLimit in configuration |apex|pu| is using a value of 10, this setting may not be sized adequately for a production environment ***
2021-10-11T09:23:35.054Z WARNING     *** jdbc.InitialLimit in configuration |apex|pu| is using a value of 3, this setting may not be sized adequately for a production environment ***
2021-10-11T09:23:36.053Z INFO        Configuration properties for: |apex||
database.api.enabled=true
db.connectionType=basic
db.hostname=localhost
db.port=1521
db.servicename=orclpdb1
misc.compress=
misc.defaultPage=apex
security.disableDefaultExclusionList=false
security.maxEntries=2000
security.requestValidationFunction=wwv_flow_epg_include_modules.authorize
security.validationFunctionType=plsql
db.password=******
db.username=APEX_PUBLIC_USER
resource.templates.enabled=true

2021-10-11T09:23:36.054Z WARNING     *** jdbc.MaxLimit in configuration |apex|| is using a value of 10, this setting may not be sized adequately for a production environment ***
2021-10-11T09:23:36.054Z WARNING     *** jdbc.InitialLimit in configuration |apex|| is using a value of 3, this setting may not be sized adequately for a production environment ***
2021-10-11T09:23:37.664Z INFO        Oracle REST Data Services initialized
Oracle REST Data Services version : 21.3.0.r2661100
Oracle REST Data Services server info: jetty/9.4.43.v20210629
Permit the request
At this stage it should be clear that we have a database running in a docker container and ORDS standalone running on the same machine which is hosting that container. ORDS has two pools configured to talk to the database at localhost:1521/orclpdb1.
If we were to go ahead and define the APEX REST Data Source at this stage we might encounter this error once we try to test it.
ORA-24247: network access denied by access control list (ACL)
Put simply, the APEX application does not have permission to make a request from the database to the host on port 8080. A network access control list must be defined. In my case I am running APEX 21.1 and therefore will grant access to the APEX_210100 database user. If you have a different version of APEX, you will have a different user in this scenario. To define the ACL and assign it run this script in the database…
For this example I created a simple database application with just a home page which requires authentication. This means that for someone to access the charts they must authenticate with APEX. At no point will they need the sysadmin credentials. The home page will display two charts showing data from a synchronisation table which is appended to every 10 minutes with the connection pool state at that point in time.
Create a simple APEX application
REST Data Source
In that application Shared Components define a REST Data Source which will automatically make a call every 10 minutes to add records to a table.
Select the REST Data Sources link in Shared Components/Data Sources
The REST Data Source type should be Simple HTTP because there’s no need for pagination or to perform any additional operations such as POST, PUT, or DELETE. Note that the Base URL is the same value as specified for the Web Credential earlier and that ORDS System Administrator web credential is selected in the Authentication section.
Define a Simple HTTP data source for host.docker.internal
Synchronisation must also be defined so that the REST call is made on a regular basis to append to a DATABASE_POOL_CACHE table. Going through the synchronisation setup wizard will result in this table being created.
Define the synchronisation frequency
The table name DATABASE_POOL_CACHE comes from the /database-pools-cache/ portion of the endpoint URL. You can choose to name it whatever suits you but you will be referring to this table later when constructing the charts.
CREATE TABLE  "DATABASE_POOL_CACHE"
   (	"ID" VARCHAR2(4000),
	"CREATED" TIMESTAMP (6) WITH TIME ZONE,
	"VALIDITY" VARCHAR2(4000),
	"BORROWEDCONNECTIONSCOUNT" NUMBER,
	"AVAILABLECONNECTIONSCOUNT" NUMBER,
	"APEX$SYNC_STEP_STATIC_ID" VARCHAR2(255),
	"APEX$ROW_SYNC_TIMESTAMP" TIMESTAMP (6) WITH TIME ZONE
   )
/
Every ten minutes the APEX REST Data Source synchronisation job will run. It will identify any synchronisation activity that is required and start making the necessary web service requests.
It won’t take long before there are records like this in the synchronisation table
The ID column contains the pool identifier. This column, along with the BORROWEDCONNECTIONSCOUNT, AVAILABLECONNECTSIONCOUNT and APEX$ROW_SYNC_TIMESTAMP will be used to chart the connection pool usage over time.
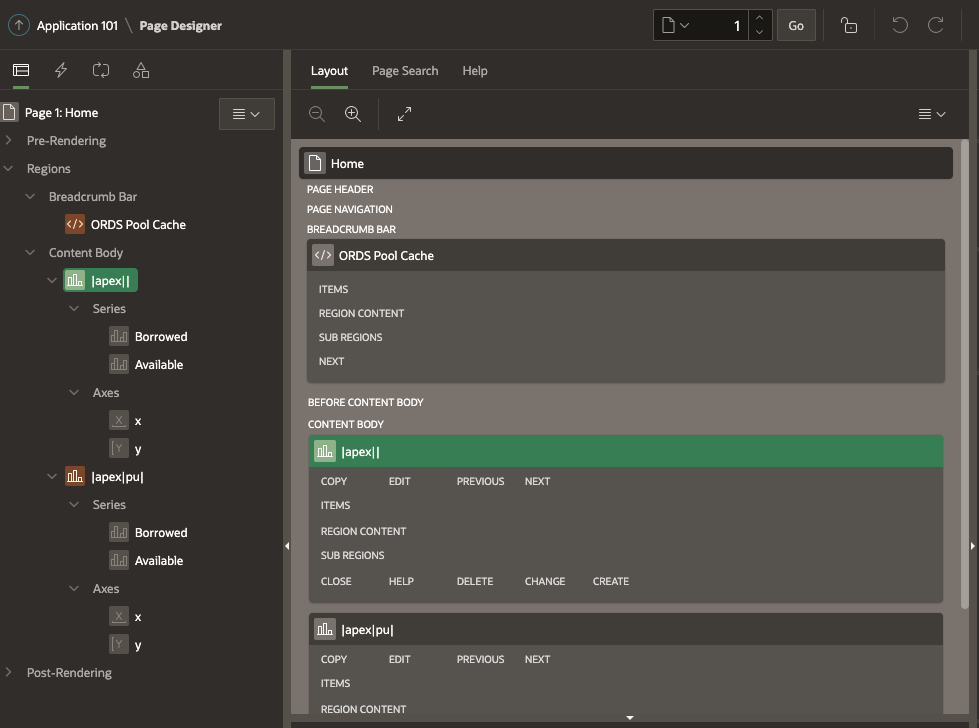
Application Home Page
Edit the home page and add a Chart instance onto the Content Body. You can first define a chart for |apex|| and then duplicate it for |apex|pu|. These represent the APEX_PUBLIC_USER and ORDS_PUBLIC_USER connection pools respectively.
For the |apex|| chart go to the Attributes section and set it as a Line chart with a 600 second automatic refresh.
Then define a Borrowed series which uses the BORROWEDCONNECTIONSCOUNT column on DATABASE_POOL_CACHE as the value to display. The Order By specifying the Row Sync Timestamp ensures that data is shown in the correct sequence.
Similarly, define a series called Available using AVAILABLECONNECTIONSCOUNT column. Note that the Where Clause restricts the records to just those applicable to the |apex||.
When duplicating this chart for |apex|pu| it is the Where Clause that must change.
The end result with two charts on the Content Body
Conclusion
You now have an APEX Application with a Home Page that is secured. Data from the DATABASE_POOL_CACHE table is shown in a chart for both pools. That data is obtained from the ORDS Instance API database pool cache endpoint. If additional pools are added to the ORDS instance the information for them will also appear in the table. However, they way this APEX application is configured it will not display any information about such new pools unless you specifically add a chart for it.
Here’s the key point though, no information about the sysadmin user credentials are exposed outside of the workspace.
Now try it out. Define an ORDS Based REST Service and use something like JMeter to call it multiple times concurrently over 20 or 30 minutes. You should see the number of borrowed connections go up and the number of available connections go down. Once the high number of requests ends the available connections increases but then drops down as the unused database connections are closed.
If going through those few APEX Application creation steps is too much you can just import the application using this ORDS_Database_Cache_APEX_App.sql script.